Showing posts with label Illustrator. Show all posts

June 07, 2021

Lancaster Archery Belt Buckle

One of the more unique projects I have done at Lancaster Archery is design a branded belt buckle. I had worked with Montana Silversmiths to create a custom, archery-specific buckle design with the Lancaster Archery logo in the center. I had pulled a lot of inspiration and landed on a classic design overall with some small archery components including targets, broadheads and arrows.


Check it out on the Lancaster Archery website here.

June 04, 2021

Story Crane

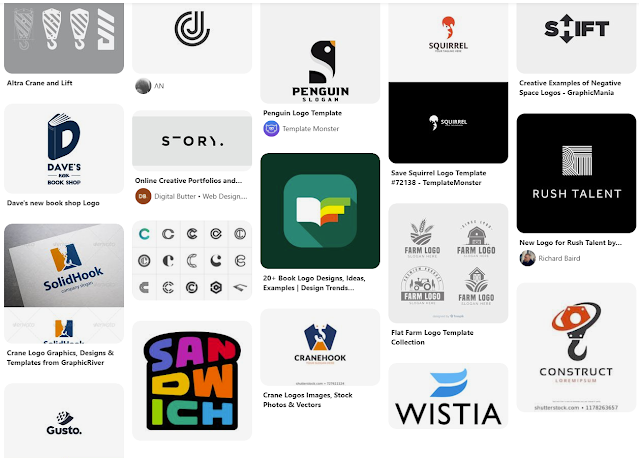
Last year I had done a freelance logo project for a friend for the brand Story Crane: a video production brand. Before I received the project, other logo design attempts were made, but weren't exactly what the client was looking for. So by the time I got the project, the client had many notes and sketches to better showcase his brand. The fact that the client put so much thought into the concept of the Story Crane brand, really made this an appealing freelance project. Not only did he provide a thorough description of how he came up with the name, but he also sent a Pinterest board with logos and graphics he liked, but also explained what he liked about the graphics. He had some loose sketches, and the one really resonated and got the wheels turning. Here is a glimpse of the Pinterest board with inspiration

I took to pencil and paper initially to sketch out a concept that incorporated a book (for story) and the letters S & C. I started stacking the S and C in a very simplistic and geometric way. I went into Illustrator to see if the sketched concept would make sense in vector form. And sure enough, I could see it coming together as I had initially envisioned. 

Below is the initial mark I created for Story Crane. I worked initially in grayscale to separate the interwoven letterforms. I also made it one color to see if it would still translate. Then I experimented with how to use two different shades to create different looks. Overall this design incorporated the pages of the book, opened and stacked, the S and C letter forms, and then also the structure of a building to reference construction cranes.


The bottom left seemed to translate the best to me, to separate the S and the C letterforms. However, the one on the right really spoke to me as a skyscraper structure. The coloration represented shadows on the building, giving the mark a lot of dimension.

From this point I threw around some other ideas in Illustrator, but every now and then you hit the nail on the head on the first attempt. I don't believe the other sketches came anywhere close, but I still sent them off to the client to see what he thought. Fortunately, him and I were on the same page.

From there I cleaned up the lines, experimented with subtle rounded corners and created some color options. For the color I wanted to stick with a monochromatic design to continue with the building shadows concept. I had also added a simple, clean typeface and stacked Story Crane underneath the mark. I had sent over the below options.

The client liked all of the versions and could see using each one in different applications. So quite honestly, this was an insanely painless freelance project! I really enjoyed being able to create something that was so well-received, following the client being initially disappointed in the designs he had received from others in the past.

Check out Story Crane: www.storycrane.com


May 18, 2021

Lila3lla Logo

My friend (Bmat of Throttle Down Speed Co.) has shared his love of video games and love of geckos with his daughter Lily. They're currently building her brand's identity: Lila3lla. He asked if I could design a logo for her. He reached out to someone on fiver a while back to come up with a proof of concept for her video game logo. He wanted something girly, but also bad ass that would tie in her love of gaming and geckos. Simple enough, right?

I thought on it for a while and finally got into Illustrator. I wanted to include how she wears her hair, how she smiles and capture part of her youth. I definitely didn't want to make her look too young in hopes of her being able to use the logo design for a few years. I went with purples to be girly yet bad ass. Through a Google search, I had found this inspiring photo of a girl holding a snake. She looked confident and powerful, which is what inspired the posture of Lila3lla's logo. Then I had to learn a bit about geckos to illustrate them accurately.

Below is the final product! She posts gecko stories regularly on her Instagram. I can't wait to see what her and her sister become as they continue to grow up.


May 11, 2021

Lancaster Archery Apparel: Zip Up Hoodie

I love a good zip-up hoodie, and the District re-fleece full zip-up hoodie is a really nice one. It is a well-constructed medium weight. I've been wanting to design on a maroon garment for a while because it is such a flattering color and is liked by all genders. District has a heather maroon that would work as the perfect canvas.

Again, I went with a one-color design. I originally had some color options with this design, however, with the garment color being a heather it made the most sense to stick with a solid white color. I do always love working with one-color to keep the cost down, especially with hoodies and their natural expense.

With this design I was mainly inspired by denim jackets, large patches, motorcycle colors and the bold statements they make. I designed this LAS mark with all of that in mind. While it has a bold "in your face" LAS in the center, it is encompassed by a circle of arrows and a handwritten-style font. This creates a bold but delicate balance within the circular design.

I added the vertical LAS logo on the bottom of the sleeve to incorporate our easily recognizable logo.


They're currently available at LancasterArchery.com

September 04, 2020

LAS Apparel: Align Hoodie

I can't say this enough... I LOVE apparel design! 

Each year LAS likes to launch some new t-shirt, hoodie and hat designs. Last year I worked on a hoodie design that I wanted to be modern, have a focus on typography and have some American design elements included. 2020 was meant to hold the Olympics, so I thought including an American theme would be appealing to our American archers.

I started with a large blank canvas in Adobe Illustrator. Utilizing different sans serif typefaces, I began brainstorming by typing out Lancaster Archery Supply and other taglines, phrases and related information. I incorporated the target, stars and the American flag in these sketches. Overall I was breaking away from the Lancaster Archery logo, while still designing with the brand in mind.

I landed on the below mock that was eventually approved by the appropriate stakeholders. This design loudly states "Lancaster Archery Supply" with an intentional focus on "Archery." "Established in 1983" is much smaller but knocked out of a white block background to provide balance in the overall design. Underneath features a flag with the company location, while intentionally emphasizing "USA."


Then came the time to source a hoodie. While using a local screen printer, I confirmed I wanted a royal blue hoodie to stay consistent with the LAS colors. At the time, LAS didn't have a bold blue garment for sale like this one, so it added variety to the apparel line. By having a bold garment, I was able to successfully use a one-color design to reduce cost overall.

After getting several hoodie samples from our screen printer, we decided to go with the Independent Trading Co. SS4500 Mens Midweight Hooded Pullover Sweatshirt in Royal Blue.


Once the hoodies were ordered and received in inventory, our in-house photographer used an in-house employee as the hoodie model. Our eCommerce team added the image and description to the site, and I included the new product in the 2019-2020 LAS catalog.


This hoodie is available for purchase on the Lancaster Archery website: https://www.lancasterarchery.com/lancaster-archery-supply-align-hoodie.html. It is definitely a design I am very proud of and pleased with the final design!

April 06, 2017

ExtremeTerrain Catalog Cover

A new catalog has dropped for ExtremeTerrain.com this week and for this drop I have designed the cover of the JK and TJ/YJ buyer books. Below is the JK Cover.


This cover image is based off of a collection campaign Top Spring Upgrades. I chose a photo that was taken by an in-house photographer as the base and did a bit of retouching and compositing to make it work best for the catalog cover. Below is the original photo with a few Camera Raw adjustments.


I made sure to green up the photo a bit more to emphasize the spring elements. I also had to build out some of the background to have the image work better with the portrait orientation of the catalog cover. 


The TJ/YJ version features a different photo of a Jeep on the trail that needed a bit more retouching and compositing to get that spring feeling. Below is the final front cover.


Below is the original photo with some minor Camera Raw adjustments applied.


And below is the full composited image used for the cover that has been built out. It is not a seamless composite since a lot of the right side of the image below was not shown on the cover and within the other graphics this campaign required.


For the TJ Jeep version I rendered out wheels as well to feature Mammoth wheels that are sold by ExtremeTerrain, rather than featuring wheels the company does not sell. They are very similar in style so it's not a very noticeable change from the original to the final image. Overall I'm pleased with how both covers turned out.

In addition to the covers, the JK catalog includes an insert. I designed a spread within this insert to feature the Top Spring Upgrade mods. Below is the spread featuring a blend of products and lifestyle photography.


This layout was meant to make a strong connection between the cover image and then also with the onsite experience.

The type treatment was also a focus for this project. I began experimenting with variations of the ExtremeTerrain font within Illustrator. My process is to carelessly play around with a font until something sticks. Below is what my Illustrator art board looked like while I experimented-a bit of organized chaos.


As you can see I used a stacked version for the print applications, but did have a use for a more horizontal orientation within email and onsite graphics. Below is a closer look at the final type treatment I used in the insert design as well as on the catalog cover.


February 28, 2017

Project Management: Brand Logos

Delegation has been the name of the game for my new Senior Designer role, and I really got a taste of it leading a project to develop a few brand logos. I was tasked to manage a project where we would design up to five new logos for new brands for various products. These logos would need to be developed by the end of Q1. Each week the design team would meet, present logo designs and critique them. Revisions were made and eventually we finalized designs. Once we landed on one, I made a few minor tweaks to clean up the files, got the proper approvals and got the files ready for our internal style guide. Four out of the five logo designs originated from other designers on my team.


The fifth logo took an additional round of designing as the initial direction wasn't entirely clear. Because of that though, the process was revised a bit to include the client earlier in the design process so that a logo wasn't finalized and not used for subjective reasoning. SpeedForm was the logo that took the most work to finalize, and overall it did turn into a solid design. Another designer had made the initial logo, but when it came time to redesign it I took a stab at it. Below is the finalized design after a few rounds of critique.


These logos will now be implemented onsite and within our various print catalogs. Most of these brands span across both of the ecommerce stores: AmericanMuscle.com and ExtremeTerrain.com.

January 26, 2017

Tear Off Talk - Presented by Throttle Down Speed Co.

It's been one of Throttle Down Speed Co.'s missions to create more videos and generate more content. Some of our first footage taken has finally taken form and was released on the blog today under the name of "Tear Off Talk".

Define: Tear Off
A tear off is a key product that nearly every racer needs to bring with them in their gear bag to the race track. A tear off is a thin piece of plastic that is attached to a motorcycle racer's helmet visor or goggles. Based on the surface of the track and the weather conditions, the amount of tear off's added to the racer's helmet or goggles varies. The bigger the roost, the more tear off's a rider will need for each time they are out on the track. While racing a rider will reach up, pull the tear off tab across their line of vision and release the single tear off and continue on racing, restoring crystal clear vision. A tear off is essential for every dirt tracker and motocross racer.

The name Tear Off Talk originated after a brief brainstorm session between Brian and I. We tossed names back and forth several times until one caught our attention. From there I designed a logo, which also took a few versions to get it to a solid point.


I believe down the line this logo could evolve into something more, however, it does the job well and works well for video intros. 

Brian got down to editing our footage of his 8 year old daughter Emma interviewing various flat track motorcycle racers. On race day, Emma came prepared with a list of questions and when it came to time for the open pits, the Throttle Down Speed Co. got behind the scenes to get Emma's questions answered. The entire process was a blast, and seeing the interviews pieced together takes on a whole new form. 

Throttle Down Speed Co.'s Tear Off Talk: What Do Professional Racers Eat On Race Day has now been released. Check it out on the Throttle Down Speed Co. Blog!

Stay tuned to see the second Tear Off Talk video next week.

January 18, 2017

Women Who Ride

I've had this vision in my head of a sticker design to represent women riders. The original photograph came from mrsjjfive's collection, a photo of flat tracker Morgan Monroe. With Morgan joining the Throttle Down Speed Co. team, the image would fit perfectly to not only represent her, but also women riders in general. 

The other evening I attempted to sketch the vision that I've carried for a few weeks, maybe even a couple months now. I took pencil to Rives BFK, took a photo of the sketch, tossed it in Illustrator and vectorize it. The graphite on the textured paper just didn't translate when I did a quick Illustrator image trace, and I was quite unsatisfied with the image. Tonight I took a second attempt-this time micron on Rives. I did most of it in a 02 micron, added detail with a 005 and then filled in the larger areas with a thick Sharpie. Already I was liking the overall image.

From there I tossed the image into Photoshop, added a Black & White filter as well as a Curves layer to make the black and white very prominent and to minimize the middle gray tones. I saved that out and tossed it into Illustrator to do a quick image trace. Since it was hand drawn the line work from the image trace was naturally imperfect. While I like the hand drawn look, I wanted to smooth out some of the line work to make the overall image more clear. Smoothing out the lines would also benefit future vinyl cuts.

To complete the image I added a black background and a thick white stroke around the entire graphic to make the woman rider really pop. Below is the transition from ink on paper to the final vector art. Stay tuned to see future applications and potential sticker and vinyl prints!


January 16, 2017

Building Vinyl

Last month I was tasked with a rather fun and typically more rare project to work on. Turn5 was looking to transform a room that would be part of a building solely for video purposes. The primary focus would be employees recording installing parts within the company vehicles. The room I got tasked to transform would be treated as a break room and also as a large meeting room. 

To kick off this project, I went to see the space, take measurements, take a ton of photos and talk to a few key people on specifications and what they would like to see in the space. From there I was brainstorming all sorts of ideas and that whole process was really exciting. There were a few design challenges involved, including the fact that no walls would be painted and that they would remain as is. Currently this room is painted a yellow shade. Also before getting started, I met with the vinyl department to see how any graphics would be implemented and discussed file size options. Once the specs were laid out, I could get to creating.


While I personally do not have a lot of experience with video, it still very much is a creative language, so I wanted to do something that would appeal to the creatives. My other mission was to include automotive and tool imagery since the installers are naturally gear heads. By mashing those two concepts as well as some subtle Turn5 branding I came up with an idea for 4 large panels. These panels would start at the very top of the wall and stretch vertically to the bottom. They would be spaced around the room on two of the walls within the break room. My overall concept was large black and white automotive-related images with video-related vector elements in the Turn5 orange.

I made two of the panel images desaturated stock photos of tools. The other two I used in-house lifestyle photography of installing parts on our company vehicles: one Mustang and one Wrangler. I also desaturated those images and balanced the black & white filters to make all four panels feel like they were cut from the same cloth. I then began to pull vector stock graphics that ranged from sound waves, gauges, timeline elements, rulers and a variety of video and camera-related imagery. 


From there, I got creative with the placement of the vector images on top of the photos. While these panels would have space in between them, one suggestion was to make them look like they were one. For example, if I placed a sound wave element running off the right side of panel one, on panel two it would come in on the left side in a similar placement. This really tied all of the panels together quite nicely. I played with the opacity of the different vector elements until I got something that felt nicely balanced throughout. The final touch to the entire imagery was to add a warm filter over the black and white images so that they would look more natural on the pre-painted yellow walls. Without the warm photo filter applied, the colors competed on the wall color, whereas the filter made it feel much more natural. 


Once I had the files created in Illustrator, I sent them to our in-house vinyl department for that team to work their magic. A few adjustments needed to be made to incorporate safe zones and the like. We ran into a few printing complications with the size and had to adjust. Soon enough they were installed within the room by the vinyl team.

January 14, 2017

Ice Racing Trophy Plates

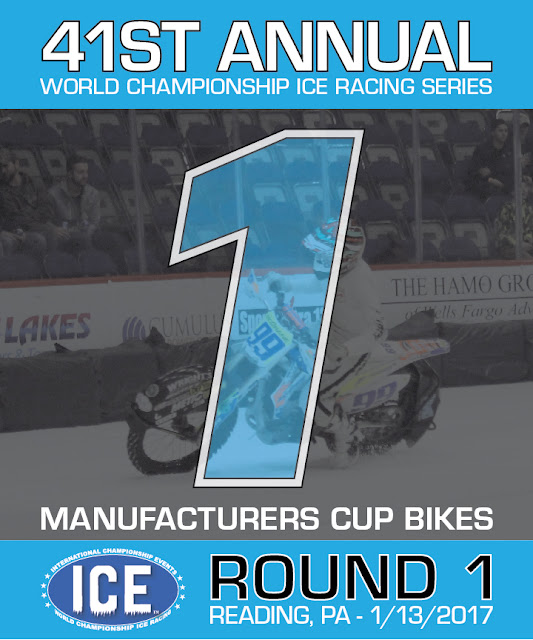
Ice racing has always been a fascination of mine, and going to a race has been on my bucket list for a few years now. Friday I finally got to cross it off the list as I attended Round 1 of the 41st World Championship ICE Racing event in Reading, PA. Lucky for me, I got to play a bigger role than just a spectator that night.


About a month ago I got in contact with the McGrane family to help with the design of the trophy plates. Fallen flat tracker Kyle McGrane called this race track home, and his brother Tommy wanted to make these plates extra special for this round. I was more than happy to help, and I got into Illustrator to put Tommy's vision to life. The whole process went really smooth, and the final printed product turned out really rad. Below are the 1st, 2nd and 3rd place plates for the bikes main event.


All three plates are very similar in their design, but the placement of the transparent picture of Kyle in the background is unique on each. I designed the 1st place plate first and made sure the 99A was large and centered. When I began to work with the 2nd and 3rd plates, the shape of those numbers were significantly different, so the placement of the 99A had to shift. I made the image a bit smaller so that when I placed it, you could see the 99A number plate clearly on each plate, while it still being fairly centered. In my opinion, this also made the 1st place plate stand out a bit more. I also did a second version of the plates for the quad class that just swapped out some copy. Tommy was really happy with the designs and printed them. 

On race day I ran an Aid to Injured Riders booth at the arena and had a great set up right inside the doors. AIR had stickers for Kyle, Charlotte, Morgan and Dominic for sale, Kyle bracelets and our flat track trading card sets. 


I ended up having some really good conversations with the fans. Some knew flat trackers, others didn't. Even those who didn't know much about flat track, still donated money, and it was yet another humbling experience. Below is an action shot of the AIR set up with Throttle Down Speed Co.'s Em front and center!


At the end of the night I got my very own copies of the number 1 plates that Logan McGrane got signed for me! I've already found a sweet spot for them in my apartment to show them off. Congratulations to Jake Mataya for making a last lap pass for the lead to put the #99A bike on top of the box.


November 15, 2016

Promotional Apparel Designs

AmericanMuscle and ExtremeTerrain are by no means an apparel company, however, over the holidays the two stores typically need a few t-shirt and hoodie designs for promotions and campaigns. Throughout the year I try to design and gather apparel designs so when promotions arise, we have things to choose from rather than rushing to create them. Below are the three designs I worked on for this years holiday promotional apparel. The designs include one ExtremeTerrain t-shirt, one ExtremeTerrain hoodie and one AmericanMuscle hoodie. The two ExtremeTerrain items have been used in the promotion I previously posted. 


The Voyager t-shirt above features a one-color vector design on the front that plays off of the idea of navigation and the compass. Nature and automotive design elements are included in this design to embrace the lifestyle of the ExtremeTerrain customer. On the back is the ExtremeTerrain logo. These dark navy graphics are screen printed on a sand colored poly-cotton t-shirt. You can purchase this hoodie here at ExtremeTerrain.com.


The Altitude hoodie above features a one-color vector design on the front. It features the XT logo and elements from the ExtremeTerrain logo to blend the two marks together. On the sleeve is a smaller XT logo that can be seen while driving and exploring the trails. The two white graphics are screen printed on a quality dark gray hoodie. You can purchase this hoodie here at ExtremeTerrain.com.


The Turbulence hoodie above features a two-color vector design on the front. It breaks apart the traditional AmericanMuscle logo and added hash marks and design elements have been added to complete the design. "American" has been knocked out so the blue from the hoodie comes through similarly to how the original logo is colored. On the sleeve is a similar one-color hash mark design featuring the AM logo that can be seen easily while driving. These vector graphics are screen printed on a quality deep royal hoodie.


I worked closely with the Merchandising team to source the garments and select the correct apparel colors and Pantones. All of these studio photos were taken by our in-house photographers. As always, I am looking forward to completing more apparel designs for these two stores and working with other designers to get their ideas printed as well.